
Technical Preview July 2021 - Livestream Overview
- Cizlin

- Jul 31, 2021
- 33 min read
Updated: Feb 9, 2022
E3, June 2018. That was when we first learned about the Flighting program for Halo Infinite. It has been a very, very long and tumultuous time since then, but congratulations Halo fans. You made it. The first Technical Preview launches Thursday, June 29. If you were invited, you'll be able to download the game on your invited platform, be it Xbox One, Series S/X, or PC starting Thursday afternoon PDT.
If you're wondering what you can expect when you jump into the Tech Preview, look no further than the VOD of 343's first Technical Preview Livestream Overview. Containing an hour and a half of discussions about all the content included in the build, as well as live and prerecorded footage of the build itself on various platforms, this livestream is a great place to learn more about the upcoming flight and the final game releasing this Holiday.
This article is extremely lengthy and took me several days to put together. With more than 100 screenshots from the livestream, it contains a ton of details about Settings, Customization, and gameplay. To help make it easier to jump to a particular section, please use the following links. For a TL;DR, be sure to check out the Summary section.
Xbox One Gameplay

10:55
If you were concerned about how the game would look on Xbox One, you'll be particularly interested in the gameplay segment around timestamp 20:30. Although many elements are lower resolution, the game still looks very nice. It is difficult to tell if the performance is as good as would be expected, but it's worth noting that:
This is a 2-month old build lacking the latest performance improvements and
The stream performance quality is likely worse than the actual performance quality.
We now know that the Xbox One is currently limited to 30 FPS in the Tech Preview, but this may be higher in the final build.

11:06
We recently learned about the Mark System in a 343 employee interview, and this is the first time we've seen it in action. The player presses a button that generates a waypoint at a location, in this case, Library. In addition to marking it visually, the action is listed in the killfeed as "[Gamertag] [Mark Symbol] [Location]", notifying the team that the system has been used to mark a point of interest.

11:34
Here, the player has died and is on the respawn screen. The respawn timer is closer in duration to Halo 5: Guardians than previous Halo games. LB and RB can be used to change the player being spectated, and the callout for the location of the player can be seen underneath their tag on the left (it is admittedly hard to see in this screencap). Finally, and most interestingly, the top of the screen shows who killed the player and how much health and shields that player had left (the white bar above their gamertag is their health).

12:28
Unfortunately, the stream quality dips a bit here, so it isn't super clear what this screenshot is showing. The player has just Back Smacked an enemy and earned the Back Smack medal. The small green square to the right of the medal name is the medal icon, which has been added in this build.

13:25
As in Halo 5: Guardians, power weapon spawns will be marked ahead of time for players to begin gravitating towards. Here, the M41 SPNKR is spawning in 16 seconds.

13:41
Unlike in Halo 5: Guardians, the Overshield, and presumably the Active Camo and other equipment items, is marked with an explicitly shown countdown. Equipment, like Power Weapons, is considered enough of a game changer to be worth fighting for.
Menus and Settings

15:12
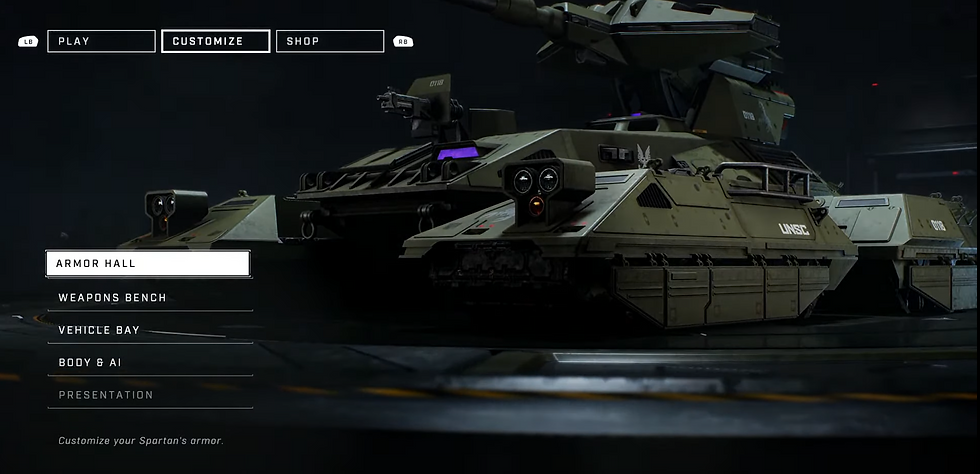
Here, we can see the main menu of the Technical Preview. The Multiplayer and Academy options are selectable with limited options within each. The menu starts on the Play tab, but there is also a Customize and a Shop menu tab. Pressing "Y" reveals the Season 0 Battle Pass, For Our Tomorrow, and pressing "X" shows Season Progress. Finally, there is a News section with multiple entries notifying players of important information during the Tech Preview.

15:17
Pressing the "Menu" button opens the Control Panel. From top to bottom, there is an option for Settings, Season Progress, News, Patch Notes, Support, Credits, and (since this is running on PC) Exit to Desktop. I am particularly excited to see support for Patch Notes within the game, as it makes it easy for players to be aware of what's changed when their build updates.

15:27
WARNING: The next several screenshots only show the Settings menus. The discussions for these menus is fairly dry, and while there are a few interesting details here and there, much of it can be skipped without major issue. Scroll down to 32:08 to skip past this section.
At this point, we get our first in-depth look at the Settings on offer for Halo Infinite. There are six Settings categories: Controller, Keyboard/Mouse, Video, Audio, UI, and Accessibility. Within this section of the Controller settings, we can see General options and Movement & Aiming options. Although not shown in this screenshot, the "B" button allows a player to leave the Settings menu, and the "X" button lets them Reset to Defaults.
Under General, we have Button Layout, Thumbstick Layout, and Vibration. Under Movement & Aiming, there are options to toggle Invert Look (Vertical), Invert Look (Horizontal), Invert Flight, and Hold to Crouch. The player can also change the Switcher Control. More on this in a moment.
The other noteworthy item here is the default control scheme, shown on the right. Here,
"LT" is Zoom
"LB" is Throw Grenade
"RT" is Fire Weapon
"RB" is Use Equipment
clicking "LS" is Sprint
clicking "RS" is Melee
"A" is Jump
"B" is Crouch/Slide
"X" is Reload/Vent or Interact if held
"Y" is Switch Weapon or Switch Equipment if held
"View" is Campaign Menu and Scoreboard
"Menu" is Game Menu or Text Chat if held
Up on the D-Pad is Mark/Helmet Light
Left on the D-Pad is Grenade Switcher
Right on the D-Pad is Drop Weapon
Down on the D-Pad is AI Scan
Of particular note are the actions for holding the "Y" button, pressing Right on the D-Pad, and pressing Down on the D-Pad. It seems likely that the Switcher Control mentioned in the settings options is related to switching equipment. Additionally, if players can drop a weapon in their hands without picking up another weapon, this would be a first for the franchise and would answer several questions raised by the Razorback. Finally, it is a bit unclear what "AI Scan" means, but I'm guessing it's that environment scan performed by the Chief right after he picks up the Mangler in the July 2020 Campaign Demo. It is likely a Campaign-only feature.
And, if you don't like any one of these choices, you can fully customize your own control scheme or use a different preset one.

15:42
Each setting offers a description in the lower right of the screen. Here is the description for the Switcher Control. Setting it to Tap allows a player to "press the input to open or close the Switcher". If a player holds the input, it switches to the last equipped item. If it's set to Hold, holding the input will open the Switcher until the input is released. Tapping the input switches to the last equipped item. It is interesting that a Switcher would be implemented in Halo Infinite. It's possible that it only plays a role in Campaign, but I will nonetheless be trying to pull this up in Multiplayer just in case.

15:45
Here are a few more Controller options under the Movement & Aiming header. Players can toggle Hold to Zoom, Hold to Sprint, Movement Assisted Steering, and Maintain Sprint. Movement Assisted Steering is described on the right as a setting that allows a player to use "LS" to "help steer wheeled vehicles in addition to steering with the camera," yet another first for the series. Maintain Sprint is an option that allows players to automatically start sprinting after performing certain actions, rather than needing to press the Sprint input again every time.

15:49
Three more Movement & Aiming settings are shown here: Auto Clamber, Step Jump, and Move Deadzone (Inner). Auto Clamber allows a player to automatically clamber onto ledges in front of them, and is somewhat standard for games with Clamber. Step Jump, on the other hand, will "reduce jump height when jumping onto low ledges." This is an interesting setting, one that I cannot recall seeing in other games. Finally, the Inner Move Deadzone refers to how much input needs to be provided to the movement stick before your character moves. You want this to be as low as possible without causing your character to drift when you release the stick.

15:52
There are Inner and Outer Deadzones for both Movement and Looking. The key with adjusting inner deadzones is to make sure they are as low as possible without causing drift when the stick is released. Outer deadzones represent how far from the edge your thumbstick can be before hitting max speed. If you look around at the edge of your thumbstick's range and notice slowness, you should increase this deadzone, again trying to keep it as low as possible without causing excessive slowness at the maximum point.
In addition to Movement & Aiming settings, there are also Sensitivity & Acceleration options. You can choose to modify your Look Acceleration (how quickly you go from zero to maximum look speed when pressing the stick to the edge), Look Sensitivity (horizontal separately from vertical), and your sensitivity at all zoom values.
The 1.4x Zoom is used by all weapons without their own scopes, such as the MA40 AR and the Pulse Carbine. The 2.5x Zoom is used by weapons such as the BR75. Other zooms not shown here include the 3.0x Zoom (e.g. VK78 Commando), the 5.0x Zoom (e.g. first zoom level of S7 Sniper), the 6.0x Zoom (e.g. Stalker Rifle), and the 10.0x Zoom (e.g. second zoom level of S7 Sniper). This also indirectly confirms that the Stalker Rifle has a 6.0x Zoom.

16:03
The Keyboard/Mouse settings are obviously similar to the Controller settings. The Movement & Aiming section has many of the same options that the Controller Movement & Aiming section had.

16:23
There is one new setting in the Movement & Aiming Section: Enable Mouse Magnetism. Toggling this option on enables a small amount of aim assist for Mouse and Keyboard users, helping to even the playing field with Controller players.

16:25
The Keyboard/Mouse settings also provide Sensitivity & Acceleration options. Keyboard/Mouse players have many of the same options that Controller players do, but some, such as the Mouse Sensitivity and Vertical/Horizontal Sensitivity Scales, are unique to the input device.

16:26
Also included within the Sensitivity & Acceleration options is Mouse Acceleration, which can be enabled and customized to the user's desire. Players can chose the minimum and maximum acceleration rates and set the acceleration scale and power. Disabling Mouse Acceleration disables all of these options.

16:27
There are multiple groups of actions to which players can bind keys. Here are some of the actions available in the On Foot category. Notice that all actions can be bound to up to three different inputs.

18:03
Players can hotkey their equipment when they have multiple pieces equipped. This is strictly a Campaign feature, meaning the four pieces of Campaign equipment will be the Grappleshot, the Drop Wall, the Threat Sensor, and, perhaps most intriguingly, the Thruster, not, as would be expected, the Repulsor. We don't know if the Repulsor could still appear in Campaign as a single or limited use item, but it is possible. We can also see that there is a Vehicle settings section.

18:05
One of the best quality of life additions in Halo 5: Guardians was the ability to switch seats in vehicles with more than one seat. Thankfully, this addition is returning in Halo Infinite, allowing players to hotswap to a different seat in their vehicle should a vacancy arise.

18:08
Just before switching over to the Video Settings, we see a few options within the Communication section of the Keyboard/Mouse Settings. It is possible to bind keys to Opening Text Chat and Push to Talk, among more settings not shown.

18:10
The next set of Settings shown is the Video settings. Under the Display category, we have Field of View, Display Adapter, Display Monitor, a Borderless Fullscreen toggle, a Window Size selector (if Borderless Fullscreen is disabled), a Resolution Scale, a UI Resolution Scale, Minimum Framerate (resolution will decrease to maintain this if necessary), and Maximum Framerate.
On the right, we can also see a bar indicating statistics related to memory. It is not entirely clear what is being represented, but my best guess is that it shows the amount of RAM currently in use, the ideal amount of RAM to have available (10,280 MB), and the maximum available. That being said, I am unfamiliar with high-end PC gaming, and this assumption could be incorrect.
Finally, although not shown in this screenshot, pressing the "Y" button enters a Screen Calibration mode.

18:58
Further down the list of Display Video settings, we can see a toggle for VSync and to Limit Framerate on Loss of Focus. This second setting allows a player to lower the framerate to the minimum while the game is in the background.
Then, in the Graphics section, there are a multitude of options that players can set to their desired level. These include Quality Preset (which is automatically detected based on the user's PC hardware and sets the following settings to appropriate levels), Anti-Aliasing, Texture Filtering, Ambient Occlusion, Texture Quality, Geometry Quality, and Reflections.
Note that many of these settings will only be available to PC players and cannot be seen on the Xbox version of the game.

19:10
Further Graphics settings available on PC include Depth of Field, Shadow Quality, Dynamic Lighting, Volumetric Fog, Sky Quality, Dynamic Wind, Decorator Quality, Effects Quality, Decals Quality, and Animation Quality.

19:15
The final Graphics Video Settings are Terrain Quality, Simulation Quality, Flocks Quality, an Async Compute toggle, and Shader Quality.
There is also a Sensory section of settings, allowing players to adjust things like Motion Blur, Screen Shake, Exposure, and Full Screen Effects.

19:17
The final two Video settings are a Speed Lines toggle and CAS Sharpening. The former is a new option that allows the player to enable or disable the line effects that appear around the edge of the screen when the player is sprinting.

19:34
There are also multiple Audio settings that players can tweak. These include Master Volume, Voice Volume, Music Volume, Menu Music Volume, Sound Effects Volume, Environmental Volume, and Hit Detection Volume. That last option is particularly important for players who do not like the chimes and tones that sometimes play alongside hitmarkers. If you don't want to hear it, feel free to turn it all the way down.
Players can also set the Dynamic Range mode, set Subtitles, and toggle which Subtitles to display with the Subtitles Filter.

20:17
The remaining Audio Settings include:
Subtitles Font Size
Subtitles Background Opacity
Subtitles Color Mode
Voice Chat Input Device
Voice Chat Mode (Note that this is set to Open Mic by default in the Tech Preview)
Fireteam & Lobby Voice Chat toggle
Match Voice Chat toggle
Incoming Voice Chat Volume slider
Spartan Chatter toggle
Mute Audio on Loss of Focus toggle.
The audio options, alongside all the other settings included in this build, are far more granular than they have ever been before.

20:23
The fifth major collection of Settings is the UI Settings. The first category of these settings is Heads-Up-Display (HUD), which includes:
HUD
HUD Opacity
Tips & Tutorials toggle
Text Chat toggle
Horizontal Display Margin
Vertical Display Margin
Multiplayer Scoreboard Control
FPS Counter toggle
Network Statistics toggle
The ability to outright disable the HUD at any time via a Setting toggle is great, as this was previously only possible through the use of the Blind skull in Campaign. Furthermore, the FPS Counter and Network Statistics options are not new features in gaming, but they are new to Halo.

21:11
There are several more sections within the UI collection, including Outlines & Colors, where the Enemy, Friendly, and Fireteam outline colors can be set; Markers & Banners, where the Player Marker Display can be changed between Service Tag and Gamertag; and UI Visual Effects, which includes things like Chromatic Aberration and Bloom.

21:41
The final set of UI settings is shown here. Under the UI Visual Effects header is the Parallax toggle. Then, under the Theater Interface section, there are toggles for Event Timeline and Controls. Although the Theater will not be included in this Tech Preview, it will be featured in the final game. The Event Timeline might be a new feature within the Theater that allows players to jump to particular moments within a match, but we'll know more in the future.
Finally, under the Weapon Offsets section, players can set the Horizontal, Vertical, and Depth Offsets for various categories of Weapons, including, but not limited to, Melee Weapons.

22:03
The final major collection of Settings is Accessibility options. Under Language, players can change the Visual Language in the game. The Menus section offers a Linear Navigation Mode toggle, UI Narration, UI Narration Rate, UI Narration Volume, and UI Text Size options. Finally, the Subtitles & Audio section includes the ability to set the Subtitles mode. This setting value is likely shared with the Audio Subtitles.

22:18
The Subtitles & Audio Settings here are identical to those seen in the Audio section, and the first three Visual Settings were seen in the UI section. What's new here are the Reticle Outline Opacity and the Reticle Outline Thickness.

22:18 (cont.)
The final Visual setting is HUD Opacity, which was already seen in the UI settings. There are two Communication settings: Text to Speech and Speech to Text toggles. And, under Sensory settings, Motion Blur, Screen Shake, and Exposure are included here in addition to the Video settings menu. There are other settings further down under Sensory, but they were also seen in the Video settings.

22:35
Now that we've finished looking at the Settings, we get to check out some of the other options within the main Control Panel. The News section shown above has multiple posts, complete with external links in each article if applicable.

22:50
As a heads up for all AMD players, make sure you update to the latest driver for your GPU in order to significantly improve the performance in the Tech Preview.
Customization
32:15
The Customization menu as seen in the Tech Preview is shown here. Everything but Presentation will be selectable in this build. While waiting on this menu, various 3D models of your selected Weapon, Armor, and Vehicle customizations will cycle in the background.

32:52
The first customization section we get to see is the Armor Hall. In this Tech Preview, only the Mark VII Armor Core will be available to customize. Underneath the 3D model of the customized armor is a small section describing various details about the item.
The manufacturer logo is the icon to the left of the rarity and the item name. The rarity text is color-coded (in this case, blue for Rare). Again, note that rarity only indicates the value of the item. There is no randomness when it comes to earning rewards. Beneath the manufacturer logo is the date on which the item was acquired. Finally, to the right of the date of acquisition is the line "Equipped for multiplayer," indicating the armor core will be the one used in multiplayer matches.
In the bottom left, we can see that pressing "B" goes back to the previous menu, pressing "A" opens the Mod menu, pressing "Y" allows the player to inspect the item, moving the right stick rotates the item, and clicking the right stick brings up options.

33:22
After some time, ske7ch performs an action (pressing "Y" to inspect) and brings up some additional information on the Armor Core. The manufacturer name, Materials Group, is shown in full, and the Release Season, Season 1, is shown beneath the manufacturer. To the left of both of these entries is the default image of the Armor Core. A description of the item appears underneath all of this ("The latest generation of powered assault armor.")
At the bottom of the screen, we can see the button options: pressing "B" returns to the previous screen, pressing "X" equips the item, pressing "Y" marks the item as a Favorite, and moving the right stick rotates the item.

34:08
Jerry Hook describes Armor Cores as "strapping on a piece of armor as a unique character," with each one having its own distinct visual style. As such, customization options for one Armor Core will not apply to other Armor Cores at launch, as confirmed by ske7ch on Twitter.
That being said, the options for the Yoroi Armor Core are impressively varied, allowing the player to equip different shoulders, chest gear, kneepads, and other elements custom tailored for this specific Armor Core.

35:25
The Weapons Bench menu has been seen before. As with the Armor Hall, the Weapons Bench shows Weapon Cores with the same type of description underneath. The manufacturer logo, rarity, item name, and acquisition date are all part of this description.

35:58
Above, we can see the MK50 Sidekick, manufactured by a different manufacturer than the MA40 AR.

36:00
The BR75 Battle Rifle is another Rare Weapon Core featured in the Tech Preview.

36:04
The VK78 Commando is also a Rare Weapon Core. It is manufactured by a third, manufacturer.

36:08
The M41 SPNKR Weapon Core is yet another Rare offering.

36:15
The S7 Sniper, also made by Misriah Armory, is a Rare Weapon Core.

36:17
The CQS48 Bulldog Rare Weapon Core can also be seen in the Tech Preview.

36:20
The final Weapon Core shown is the Rare MLRS-2 Hydra.

36:53
The Vehicle Bay customization allows players to scroll through all the Vehicle Cores. Pressing "B" returns to the previous menu. Pressing "A" opens the Mod menu for the Vehicle Core. Pressing "Y" inspects the item. Using the right stick rotates the item, and clicking the right stick shows options for the item. The item shown here is the M12 Warthog Rare Vehicle Core. Note that although the Vehicle Bay is visible in the Tech Preview, no vehicle content will be available to use in-game in the Tech Preview.

36:59
The second Vehicle Core is the Rare M290 Mongoose.

37:01
The M808 Scorpion is an Epic (purple) rarity Vehicle Core.

37:05
The AV-49 Wasp is another Epic Vehicle Core.
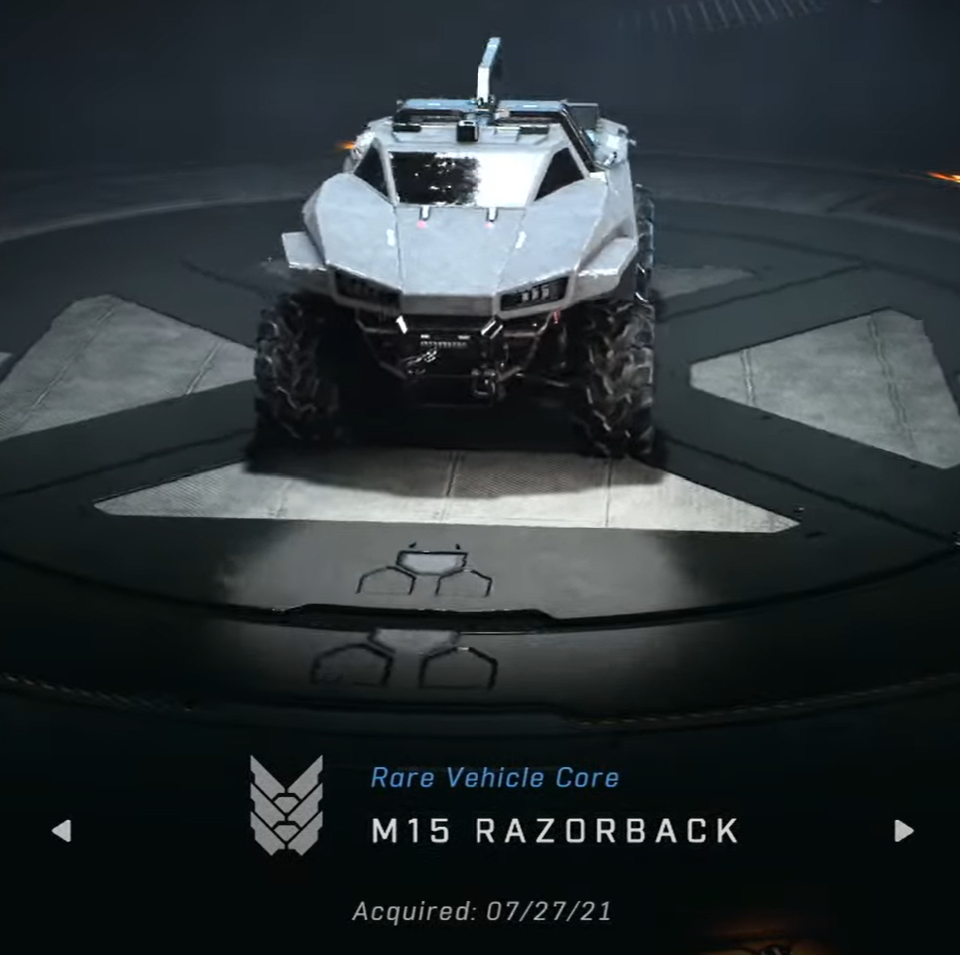
37:11
The M15 Razorback Vehicle Core is a Rare item.

37:17
The M290-M Gungoose Vehicle Core, like the M290 Mongoose, is a Rare Vehicle Core.

37:25
The final Vehicle Core available is the Epic M12R Rockethog.

37:34
The final available menu is the Body & AI menu. The four options presented here are Body Type (which is a slider from 0 to 2), Prostheses, AI Model, and AI Color. Body Type 0 is shown here.

37:36
Body Type 1, shown here, is slimmer than Body Type 0.

37:37
Body Type 2 fits between the other two Body Types in terms of bulkiness.

37:55
The Leg options for Prostheses are shown here. Players can choose between None or Transtibial.

37:56
The Transtibial Prosthesis replaces the lower half of the leg with a robotic appendage.

38:35
The AI Model menu is shown above. There are four Personal AI options, with the first option, Butlr, highlighted and selected. Butlr is a Common (gray) AI Model, as indicated above his name. Beneath the AI selection row is the acquisition date. Above the right side of the selection row is a Filter & Sort, which is set to All and Default (ascending), respectively.
Although not shown in this screenshot, pressing "B" returns to the previous menu, pressing "A" inspects the highlighted item, pressing "X" Equips the highlighted item, and clicking the right stick pulls up the Options for the item.

38:36
The Circ AI Model is a Rare item, and the AI is shaped like a sphere with a segmented ring around it.

38:36 (cont.)
The Fret AI model is also a Rare item. This AI is shaped like a square pyramid with each corner truncated slightly.

38:37
The Lumu AI Model, which we have seen and heard in several previous videos, is a Rare item.

39:18
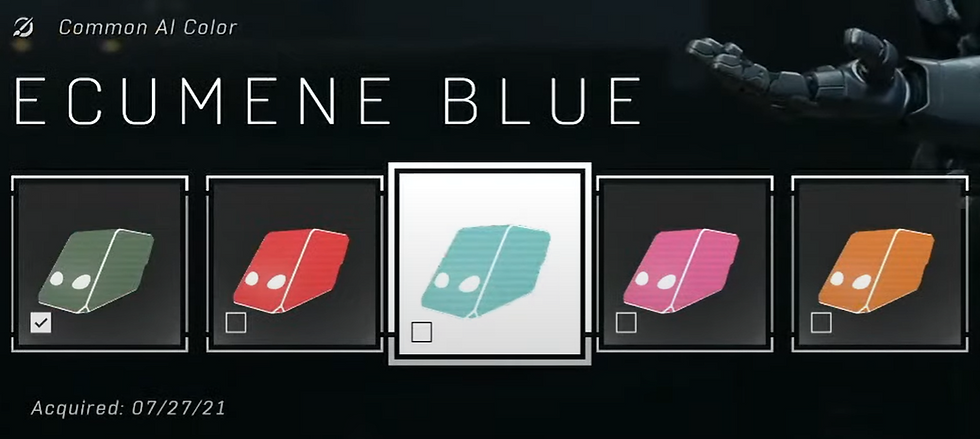
The AI Color menu is very similar to the AI Model menu and, as we'll see shortly, the armor customization menus as well. All five colors are Common items, and the green option is called Eridanus Sunset.

39:19
The Bloodhand AI Color is red, as opposed to the default green.
39:19 (cont.)
The Ecumene Blue AI Color is a cyan blue.

39:20
The Lightish Red AI Color is not pink. Trust me.

39:20 (cont.)
The final AI color (for Butlr at least) is Promethean, which is orange.

39:31
The Presentation menu will not be available in this Technical Preview, but the description mentions emblems, announcer voice, Service Tag, and more that will eventually be customizable from this screen.
40:55
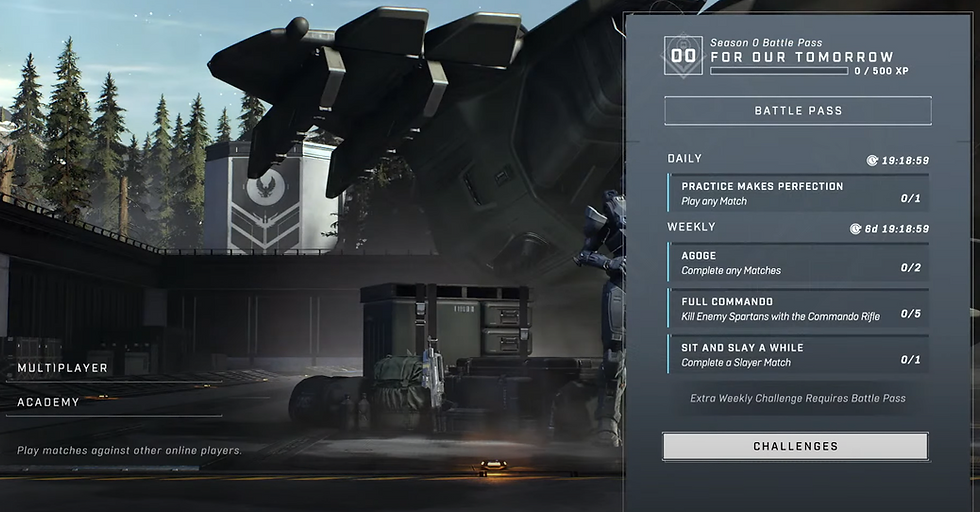
Returning to the main menu, pressing "Y" opens the Challenge Overview. From here, the Battle Pass and the Challenges page can be selected. The top bar shows the Season number and name, as well as the player's current rank and progress in the Season. There are one Daily Challenge and three Weekly Challenges listed, and there is a line that says "Extra Weekly Challenge Requires Battle Pass."

41:10
The Challenges Menu shows the Battle Pass progress in the top left and features the Daily and Weekly Challenges seen in the Challenge Overview. If you complete enough Weekly Challenges, you'll be able to work on and complete the Capstone Challenge, which will in turn unlock the Stone Green Armor Coating in the Tech Preview. Selecting the button to the left of a Weekly Challenge will allow you to swap it out for a different randomly selected one. Completing challenges awards XP, which is used to progress in the Battle Pass.
Although not show in this screenshot, pressing "B" returns to the previous menu, pressing "X" takes you to the Buy Battle Pass screen, and pressing "Y" shows the Upcoming Challenges (having played some of the Flight, this shows more Weekly Challenges that will rotate in as you complete the Active Weekly Challenges.)
42:22
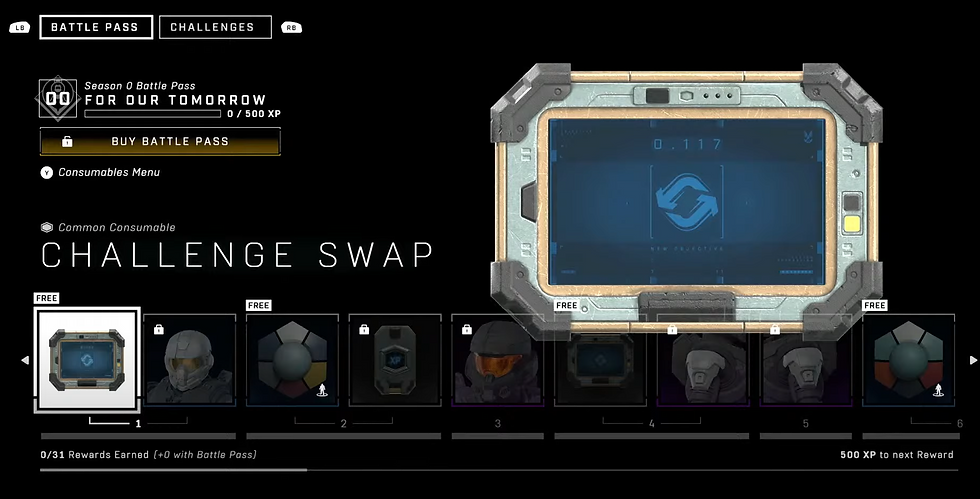
The Battle Pass in the Tech Preview contains 20 tiers and 31 items. Whenever two items are available on one Battle Pass tier, the left one is always Free. While all tiers have a paid reward, most tiers still have free items. If the Battle Pass hasn't been purchased yet, there is an option to buy it. Pressing "Y" will bring up the Consumables Menu where you can activate an XP boost or view your Challenge Swaps. In the Tech Preview, each tier requires 500 XP, which is earned from Challenges.

42:27
Choosing the Purchase Battle Pass option on the Battle Pass screen bring up a menu for players to purchase the Battle Pass with Credits. In the Tech Preview, it will cost 250 Credits to purchase the Battle Pass (3000 are automatically allotted to all players in the flight).
43:10
"In most systems, you have large swaths of the tiers that aren't earned unless you're premium. For us, we want you to earn every step of the way." - Jerry Hook
This statement suggests that every Battle Pass tier will have a free item alongside the premium item. This is not the case in the Tech Preview, but he may be referring to the Season Passes in the released game. Alternatively, this may not have been meant to literally mean every tier has a free reward but that free rewards are present at tiers throughout the Battle Pass, not just in the first few tiers.

44:02
The Armor Customization options available in the Tech Preview are shown in part here. From right to left, we have Armor Kit, Coating, Helmet, Visor, Chest, Left Shoulder, Right Shoulder (the paint palette is an incorrect icon), Gloves, and Wrist. The name of the Socket is listed above the set of options, and the description is listed below it. The Armor Kit is a set of "unique items that get applied as a pre-set combination." Although we will not have any Armor Kits in the Tech Preview, I'll have more to say on this shortly.

44:07
The Coating menu is shown first, and there are numerous options immediately available here. The first is Cadet Grey, a Common Armor Coating that, as the name suggests, colors the armor gray with some small orange highlights. There are other Cadet and Recruit Armor Coatings shown below, and all of them seem to be unlocked by default in the Tech Preview.

44:09
The second Armor Coating is the Common Cadet Blue, which colors most of the armor blue with some silver and gray highlights.

44:09 (cont.)
The third Armor Coating is yet another Common item called Cadet Red. It has a similar pattern to Cadet Blue, but there is gray on the front top of the helmet where there was blue on Cadet Blue.

44:09 (cont.)
The Recruit Brown Armor Coating is a Common item that colors the armor brown with yellow lights on the front of the chest.

44:09 (cont.)
The Common Recruit Cyan Armor Coating colors the armor Cyan with gray and silver highlights.

44:10
Recruit Forest is another Common Armor Coating featuring green color with additional gray highlights.
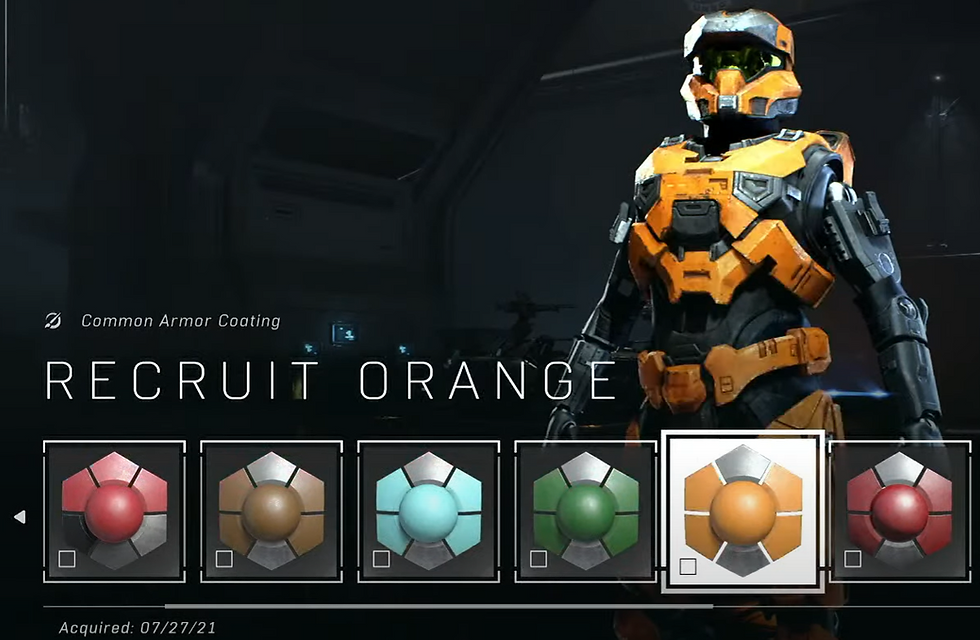
44:10 (cont.)
The Common Recruit Orange Armor Coating has an identical pattern to the Recruit Forest Armor Coating but uses orange as the primary color instead of green.

44:10 (cont.)
The Common Recruit Red Armor Coating is similar to the Cadet Red Armor Coating, but it is using a darker shade of red.

44:10 (cont.)
The Recruit Sage Common Armor Coating features a lighter green than the Recruit Forest Armor Coating.

44:10 (cont.)
Recruit Violet is a Common Armor Coating that, as one might guess, colors the armor violet. It also features several gray and silver highlights.

44:10 (cont.)
The final Recruit Armor Coating is the Recruit Yellow Common Armor Coating, featuring a bright yellow color scheme for your armor.

44:11
This Armor Coating is Rare and features multiple colors, primarily light blue and white with orange highlights.
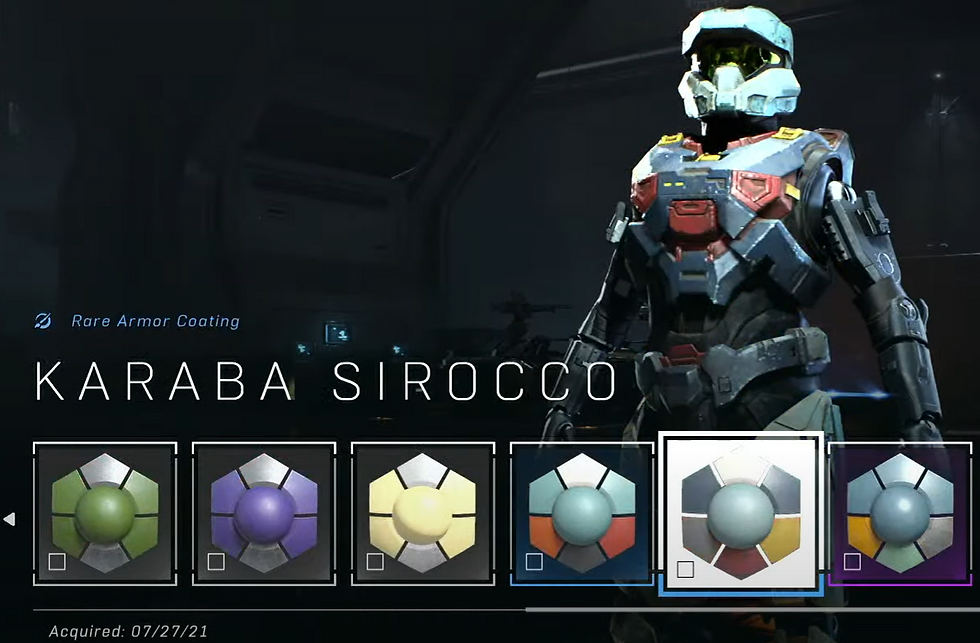
44:11 (cont.)
The Rare Karaba Sirocco Armor Coating features a large variety of colors such as dark blue, crimson, teal, and yellow, and it is likely a reference to Gundam.

44:11 (cont.)
The Arctic Void Armor Coating is an Epic item, and it features teal, light green, and yellow coloring on the armor.

44:11 (cont.)
The Blue Rampage Armor Coating is another Epic item. The chest and waist are bright red, while the helmet and legs are dark blue.

44:11 (cont.)
The Cosmic Corruption Armor Coating is also Epic. It offers lavender coloring with a unique pattern on the helmet.

44:12
The next Armor Coating is Ghost Grey, an Epic-tier item that applies a white and gray camo to most of the armor with some gold and brown highlights.

44:12 (cont.)
The Scorpion Punch Armor Coating is one we've seen before and has gray on all the armor except the right arm. Since there is no armor on the right arm prosthesis, it is not shown on the preview. It is an Epic item.

44:12 (cont.)
The Tahuna Sands Armor Coating is the final Epic-tier coating. The coating paints the armor white and orange, with dark gray on the waist.

44:13
The Estate Gold Armor Coating is the first Legendary Armor Coating offered in the Tech Preview. The coating is primarily metallic blue with metallic gold highlights.

44:14
The Hexen Slate Armor Coating is Rare, and it consists of multiple shades of tan on the armor.

44:15
The final coating shown is the Rare Stone Green Armor Coating, which features green on all the armor except the helmet, which has white and gray paint. There is one more coating available for viewing in the Tech Preview, but ske7ch does not show it in the livestream.

44:17
After cycling through most of the Armor Coatings, we then get to see a few of the helmets available in the Tech Preview. The first is Cavallino, a helmet that bears some resemblance to GEN2 Recruit. It is Common, and there is an additional line of text beneath the acquisition date that indicates Helmet Attachments are available. (In the Flight, all helmets have this appear, even if there are not attachments available for the helmet in question).

44:17 (cont.)
The Aviator Helmet is a Rare offering. It is an evolution of the GEN2 Aviator helmet, redesigned to fit within the Mark VII design language.

44:18
The Enigma helmet is a new Rare Helmet that we have not seen before. It may be a revised GEN2 helmet, but it us hard to know which one is the inspiration.

44:19
The Trailblazer Helmet is an Epic item. It appears to be an evolution of the Recon GEN2 helmet.
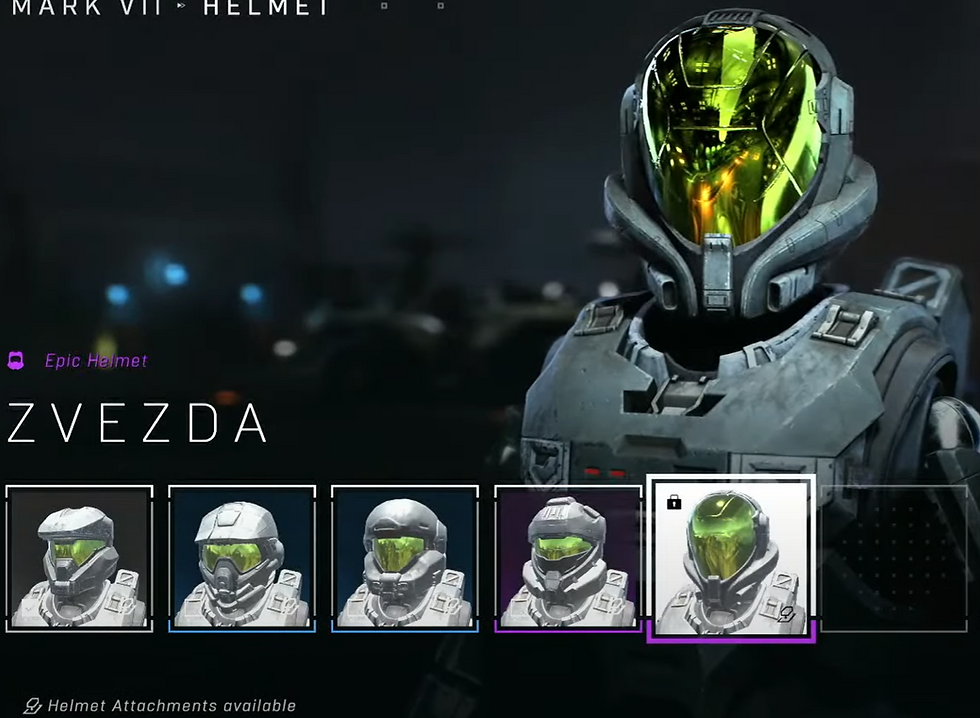
44:19 (cont.)
The Zvezda Helmet is the final option available within the Tech Preview. An Epic item, the helmet has some similarities to EVA.

44:22
There are multiple visor options available within the Technical Preview. The first is the Common Enlisted Visor, which is a greenish gold color.

44:23
The Rare Goblin visor is metallic green in color.

44:26
The Phalanx visor is a Rare item with a metallic blue/purple color.

44:26 (cont.)
The Dragoon Visor is the first Epic quality visor shown. It is metallic red in color.

44:27
The Rampant Visor is an Epic item with metallic orange coloring.

44:27 (cont.)
The Vandal Visor is yet another Epic equality item, this time with a metallic yellow coloring. There is another visor past the Vandal Visor that was not shown in the livestream but can be seen in the Tech Preview.

44:34
There are multiple chest pieces available in the Tech Preview as well. Note that some of these items are bugged within the build shown in the livestream and do not appear to be any different from the default option (which is no additional Chest armor). This issue has since been resolved in the Tech Preview. The first option is the UTIL/ENAV Beacon chest, a Common Chest item. The attachments on this piece are not showing in the Tech Preview currently.

44:34 (cont.)
The UA/M550D Halfplate Chest is a Rare item. It is currently appearing as intended within the flight.

44:34 (cont.)
The UA/M557 Jackplate Chest is another Rare item. Unfortunately, the Tech Preview does not currently display this chest properly.

44:34 (cont.)
The UA/RELIKT Cuirass is the only Epic Chest visible in the build. Unfortunately, it, too, is not appearing properly.

44:35
The UTIL/KHILPK Cooling Unit Chest is the final Chest included in the Tech Preview. It is a Rare item.

44:39
The Shoulder Pad can be removed completely if the player presses the "X" button while on their equipped Shoulder Pad. The UA/ALAIR Shoulder Pad is a Common item.

44:39 (cont.)
The UA/VITUS Left Shoulder Pad is the other Common Left Shoulder Pad in the Tech Preview.

44:39 (cont.)
The first Epic Left Shoulder Pad is the UA/AGATHIUS, one of the first Shoulder Pads we ever saw for Halo Infinite.

44:39 (cont.)
The final Left Shoulder Pad included in the Tech Preview is the UA/VIATOR Epic Left Shoulder Pad.

44:52
After showing the Left Shoulder Pads, ske7ch skips over the Right Shoulder Pads and the Gloves to show Hip customization. As with Chest and both Shoulder Pads, players can elect to unequip their currently equipped item by pressing "X" while the item is highlighted. Unfortunately, as happened with some of the Chest armor, none of the Hip selections are showing properly in this build. The first Hip item shown is the MAT-2550\GRENADE Pack, which is Epic in quality.
44:53
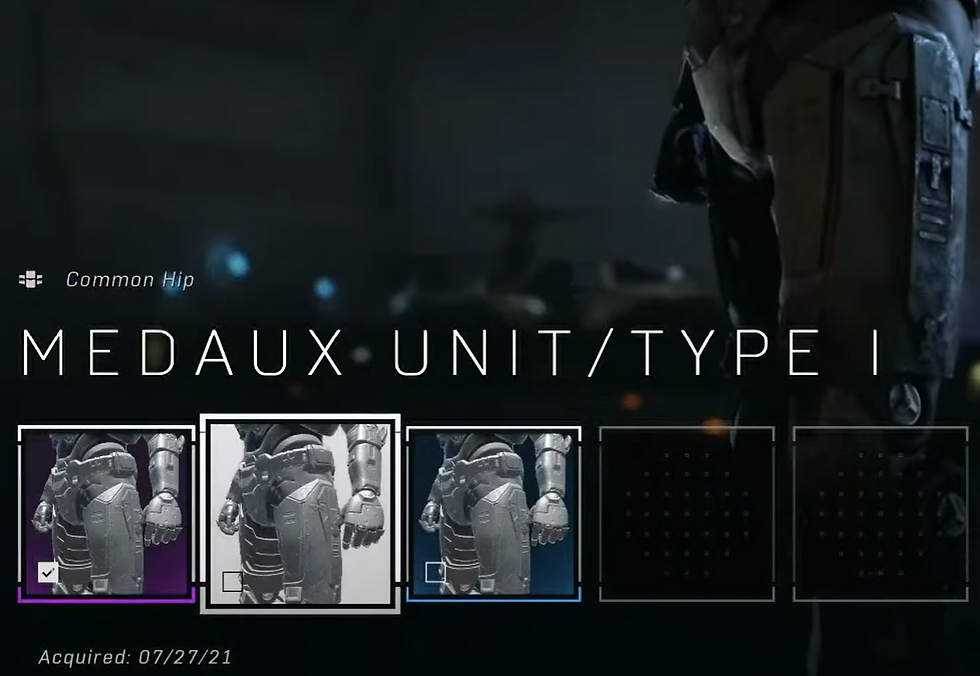
The Medaux UNIT/TYPE I Hip is a Common item. As with the previous Hip shown, the differences between this Hip and the unequipped default are not visible.

44:53 (cont.)
The Medaux UNIT/TYPE II Hip is the final Hip item included in the Tech Preview. It is a Rare item, but as before, it is not appearing properly in this build.

44:55
The next customization category shown is Knee Pads. Unlike Shoulder Pads, Chest, and Hip customization options, there is no "None" option for Knee Pads. The UA/TYPE SA Knee Pads are shown here first. They are Common items.

44:56
The UA/TYPE RG Knee Pads are another Common item.

44:56 (cont.)
The final Knee Pads included in the Tech Preview are the UA/TYPE SP Epic Knee Pads.

45:02
The Gloves customization options were shown after the Knee Pads. In the Tech Preview, there is only one option for Gloves: Capaxx. These Gloves are Common in quality.
45:48
"So a kit, for example, you might get Jorge or Emile, and that is an entire kit unto itself." - Jerry Hook
The Armor Kit is further explained here. It is a predesigned set of unique pieces that can apply to an Armor Core and override individual part choices for the other Sockets. Moreover, these Armor Kits may be a way to adopt the look of major characters from the Halo universe, such as Spartan Jorge or Spartan Emile.
Weapon Drills

53:32
Prior to showing off the weapon drills, Tom French describes the general flow for the Academy. First is the initial tutorial, familiarizing the player with the game and their Spartan's place in the universe. Then there are Weapon Drills, which allow players to use the various weapons against noncombative Bots. The third step is Bot-based Custom Games, where a player can jump into 4v4 Bot-filled Custom Games with 3 Bots on their team and 4 on the enemy team. Bot difficulty and player loadout can be configured as desired in these games. Finally, players can jump into 4v4 Bot Arena matches where they partner up with other players against teams of Bots.
In the Technical Preview, Weapon Drills and Bot Arena will be available for players to try. Shown above is the Weapon Drills Menu, accessed from the main menu and containing a list of each weapon available to use in Weapon Drills. Beneath the list of Weapon Drills is a description of the currently highlighted weapon alongside its damage type. For the MA40 AR, the description says "Fully-automatic rifle effective at short to medium range." The damage type is Kinetic.

53:34
The Pulse Carbine is described as a "Burst-firing plasma weapon effective at close to medium range. Projectiles track targets." It has a Plasma damage type.

53:34 (cont.)
The BR75 description reads, "Semi-automatic rifle best in mid-range engagement with its three-round burst. Equipped with a 2.5x scope." It has a Kinetic damage type.

53:34 (cont.)
The VK78 Commando says, "Precision automatic rifle with heavy recoil. Effective at medium to long range." The weapon uses the Kinetic damage type.

53:34 (cont.)
The MK50 Sidekick is a "Semi-automatic kinetic firearm effective at close to medium range." As with most UNSC weapons, the damage type is Kinetic.

53:35
The description for the Plasma Pistol is "Semi-automatic energy weapon capable of a scaled-burst effect which strips shielded targets." It deals Plasma damage.

53:35 (cont.)
The CQS48 Bulldog is described as a "Fast-firing, tactical shotgun effective at close range." The damage type is Kinetic.

53:35 (cont.)
The Heatwave is a "Hardlight grenade launcher with a deadly, implosive blast. Can control projectile while zoomed in." (Having used the weapon a bit in the Tech Preview, that last sentence is slightly inaccurate. The projectile firing pattern is changed by pressing the zoom in button, so there is technically no zooming with the weapon.) The weapon deals Hardlight damage, characteristic of many Forerunner weapons.

53:36
The Needler description reads, "Exotic, guided-munitions weapon firing crystalline shards that track, impale, and detonate on soft targets." Surprisingly, the weapon uses the Kinetic damage type, meaning it does more damage to health than shields.

53:36 (cont.)
The S7 Sniper is a "Long-range precision rifle with two zoom distances. Headshots kill instantly." The damage type indicator for this weapon is a little difficult to see, but it looks vaguely like an explosion. Perhaps this damage type is called "Power," as we will shortly see it is shared with all Power weapons.

53:36 (cont.)
The Skewer description says, "Kinetic weapon that shoots a single, high damage spike." It also does "Power" damage.

53:36 (cont.)
The Ravager is described as a "Burst-firing weapon that fires globs of punishing plasma." It uses the Plasma damage type.
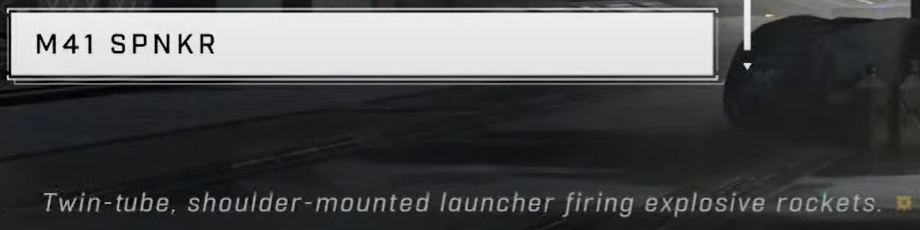
53:36 (cont.)
The final Weapon Drill is for the M41 SPNKR, whose description reads, "Twin-tube, shoulder-mounted launcher firing explosive rockets." Like the S7 Sniper and Skewer, it uses the "Power" damage type.

53:58
After choosing a weapon within the Weapon Drills menu, you will be able to choose between three tiers of Weapon Drills. The first (1) features Bots that stand still, allowing you to get used to aiming and hitting shots. The second (2) features Bots that move from side to side or crouch up and down, and the third (3) features Bots engaging in basic shot avoidance behaviors, strafing left and right erratically or crouching behind cover temporarily.
Each Weapon Drill is scored based on the number of hits and kills you get during the drill. Reaching certain score thresholds will award you stars, up to a maximum of 3.

55:11
When loading into a Weapon Drill, you will be able to run around in a small enclosed area without a weapon until you pick up the weapon in front of you. Once you pick up the weapon, you will have a few more seconds to get ready before the timer at the bottom begins to count down. At that point, you will be able to attack continuously spawning Bots until the timer runs out.

56:03
You will be scored and awarded stars depending on that score. Different Weapon Drills are custom designed for their associated weapons, so score thresholds will differ from drill to drill. You can also immediately jump into more drills if you desire.

58:46
The default Heatwave reticle is a long horizontal group of dots within brackets. When the weapon fires, six hardlight grenades fire in this horizontal pattern.

59:10
The alternate Heatwave firing mode is accessed by pressing the zoom in button. It switches the weapon to a more tightly grouped vertical fire pattern with a slower firing rate. In both modes, shots overpenetrate targets. The weapon has an eight-round magazine (not shown) and reloads one at a time.
General Discussion
1:03:33
"So each day, we're going to be looking for which player has slayed the most Bots, who's won the most games, and...which team has been able to get 50 slays and win their game against Bots the fastest. And what's really cool, and a twist here, we're going to track all that. We'll shout you out on our social channels. But when this game launches this Holiday, we're going to capture your Gamertags now, and...you'll be the first ever recipients of one of our exclusive nameplates for the Fire Unicorn, which has been something that we had throughout Halo 5, a little bit in MCC as well." - Brian "ske7ch" Jarrard
Each day in the Tech Preview, the players who kill the most Bots and who win the most games, along with the team who wins the quickest, will receive the Fire Unicorn nameplate in Halo Infinite. The Fire Unicorn nameplate is reserved for special giveaways by 343i, but the most consistent way to earn the Fire Unicorn items in Halo 5: Guardians and Halo: MCC is to get featured in the monthly Community Spotlight posts. So, start making your own Halo content for a chance to be featured. Art, toy photography, and anything else where someone creates new Halo content can be featured in these articles, and everyone who is featured receives the Fire Unicorn items in all active games. It is unknown when the Halo Infinite Fire Unicorn nameplate will be added to this set, but I'll be sure to write about it once it is.
1:04:25
"We're thinking about possibly turning on some Classic Slayer Arena as well at the end of the weekend." - Brian "ske7ch" Jarrard
For Tech Preview participants interested in a more classic PvP experience, be sure to play a ton over the weekend to reach 343i's goals for the flight. If enough players play and generate enough data, this option will be unlocked later in the day on Sunday. Note that there is a bug causing some matches to start without a fourth player on the team, so it may not be the most polished experience, but it should be fun to try despite the issues.
1:04:31
"We're going to start with Live Fire, ...and then we'll...add Recharge, and then we'll add...Bazaar." - Tom French
Also, as everyone knows by now, the plan for the Tech Preview is to start with the map Live Fire, add Recharge on the second day, and then add Bazaar on the third day.
1:06:27
"[Splitscreen] is not supported in the Tech Preview." - Brian "ske7ch" Jarrard
Unfortunately, Splitscreen is not supported in the Tech Preview. It will still be present at the launch of the game this Holiday, but it is not supported in this build.
1:07:14
"So, [assassinations] are not in for launch." - Tom French
Assassinations will not be included in Halo Infinite at launch, which means there will be no fancy animation for holding down the melee button when attacking someone from behind.
1:07:50
"When we bring [assassinations] back, we want them to be back and fit right into our sandbox and the loops of the game, and bring them back in a way that feels meaningful so they're always an accessible tool, but also kind of a flourish moment." - Tom French
The good news is that 343i doesn't want to keep assassinations out of the game forever. Their hope is to make assassinations fit more smoothly in the sandbox and combat loops of the game, rather than rip someone out of play for a few seconds.
Xbox Series X Gameplay

1:10:17
In the final minutes of the Tech Preview Livestream, we get footage of a full Slayer match played on Xbox Series X. Here, the player has picked up the Skewer. The reticle for the weapon is small and seems to indicate that it has projectile drop-off at long ranges. The weapon only holds one round at a time, with at least three in reserves.
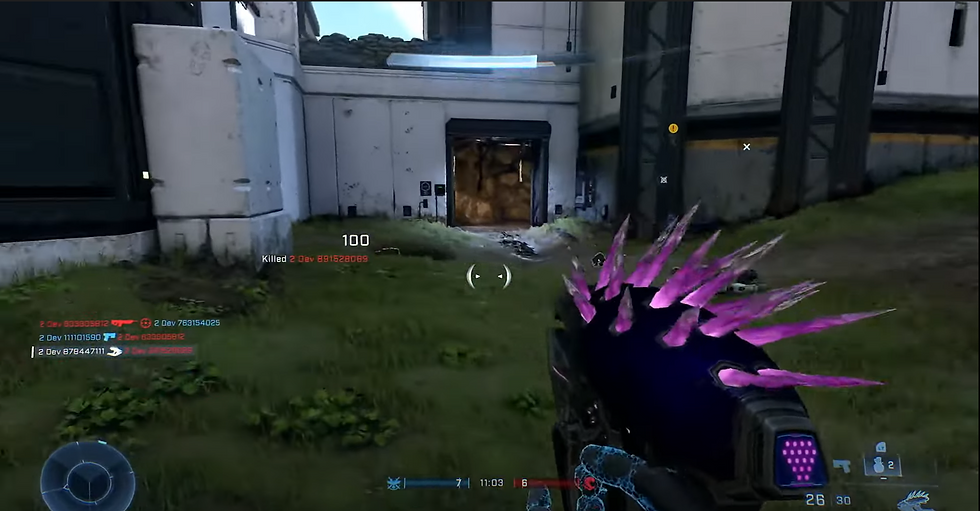
1:10:46
The Needler has a 26-round clip and starts with 52 rounds (not shown here). The reticle is similar to how it has appeared in previous games.

1:13:03
When on the respawn screen, there will sometimes be a tip popup on the right. In this case, the tip is titled "I Need a Weapon" and says, "If a Weapon Rack is glowing red, it can't spawn any more weapons until the current ones get depleted. Find those who have them." This behavior was originally introduced in Halo 2 and formally applied to "Tier 2" weapons in Halo 5: Guardians. It seems that it is returning for Halo Infinite now.
Summary
Whew. This has been one of the longest articles I have ever written, largely due to the sheer number of settings options and customizations shown in this livestream. There are tons of screenshots from that livestream above, but if you want a short and sweet summary of what we learned, you'll find it here.
Xbox One Gameplay
Footage on Xbox One was shown. The build currently runs at 30 FPS on this system, but it still looks rather nice.
The Tech Preview is based on a build that is around two months old and lacking many of the performance improvements present in the main build.
The Mark System places a marker where the player is aiming, and it notifies other players through the killfeed.
The respawn screen allows players to switch between their teammates and shows the health of the player that killed them at the moment they died.
Respawn times are currently 8 seconds.
Medal icons appear to the left of the reticle when earned.
Power weapon, Overshield, and Active Camo spawns are marked ahead of time and respawn on fixed timers.
Menus and Settings
There are tons of Settings available in the Tech Preview, more than have ever been in a Halo game.
In Campaign, there will be Switchers for Grenades and Equipment allowing players to quickly swap to a different item.
Players can now drop weapons at the press of a button without needing to pick up another weapon. The player must have at least one weapon at all times, however.
Players can press a button to perform an AI scan, which highlights weapon spawns and dropped items through walls.
Players can enable Movement Assisted Steering to be able to use left and right movement controls to help steer wheeled vehicles.
Players can enable Step Jump to reduce jump height when jumping onto low ledges, preventing a small hop from requiring a full height jump.
Players can tweak sensitivity by zoom level.
The Stalker Rifle has a 6.0x zoom.
Mouse & Keyboard players can enable the Enable Mouse Magnetism setting to add a small amount of aim assist to their mouse movements.
The Thruster equipment will be featured as one of four equipment items within Campaign.
The Switch Seats feature added to vehicles in Halo 5: Guardians is returning.
There will be many graphics features available only to PC players, where they can customize their experience to their liking.
Players can turn off Hit Detection sounds by setting the Hit Detection Volume to 0.
The HUD can now be disabled directly in the UI settings for screenshot purposes.
Players can display an FPS Counter (on PC only) and Network Statistics.
Fireteam outline colors can be set separately from Friendly outline colors.
Players can be marked by either their Service Tag or their Gamertag.
Theater will be returning, but it is not present in the Tech Preview.
Players can tweak Weapon Offsets for several categories of weapons.
Players on AMD GPUs should update to the latest driver for their GPU before playing in the Tech Preview.
Customization
The Armor Hall, Weapons Bench, Vehicle Bay, and Body & AI categories will be accessible in the Tech Preview.
Within the Armor Hall, players select an Armor Core to customize.
All customization items have a manufacturer with an associated manufacturer icon.
All customization items have four Quality levels: Common (Gray), Rare (Blue), Epic (Purple), and Legendary (Yellow).
All customization items have an acquisition date (if acquired) or unlock requirements (if not acquired).
All customization items can be inspected to view lore and other details.
All customization items can be favorited.
Armor Cores are an underlying base suit of armor upon which customizations are applied.
All armor customizations are currently Armor Core-specific, so at launch, players will be unable to apply cosmetics from one Armor Core to another.
The same principle applies to weapon and vehicle customizations. All customizations are core-specific.
Although only the Mark VII Armor Core is featured in the Tech Preview, multiple Weapon and Vehicle Cores can be viewed, and some weapon cores can be customized.
There are three Body Types: 0, 1, and 2. Body Type 1 is the thinnest while 0 is the thickest. Body Type 2 is between 0 and 1.
Players can choose between having no leg prosthesis or having a transtibial prosthesis on one or both legs.
There are four AI Models to choose from: Butlr, Circ, Fret, and Lumu.
In most customization menus, players can filter and sort the cosmetics to find a particular option to their liking.
There are five AI Color options for all AI Models: Eridanus Sunset (green), Bloodhand (red), Ecumene Blue (blue), Lightish Red (pink), and Promethean (orange)
There will be one Daily Challenge and three Weekly Challenges that can be progressed at once.
Purchasing the Battle Pass allows an additional Weekly Challenge to be progressed simultaneously alongside the other three.
New Daily and Weekly Challenges will rotate in as current ones are completed until all Challenges in the category are completed.
Players can use a Challenge Swap to replace a Weekly Challenge with a new, randomly selected Challenge.
The premium currency in the game is called Credits, and it can be used to purchase the Battle Pass, purchase tiers in the Battle Pass once it has been bought, and purchase items in the Shop.
There are Free rewards consistently throughout the Battle Pass.
The Armor Core Customization available in the Tech Preview is Armor Kit, Armor Coating, Helmet, Visor, Chest, Left Shoulder Pad, Right Shoulder Pad, Gloves, Wrist, and Knee Pads.
There are tons of Armor Coatings unlocked by default, mainly featuring a single color with gray and silver highlights.
Many customization options were shown in this livestream. View the Customization section for screenshots of everything shown.
Armor Kits are a fixed set of unique armor attachments for a particular Armor Core that can be used to create a particular look. For example, there might be an Armor Kit to look like Spartan Emile or Spartan Jorge on the Mark V Armor Core.
Weapon Drills
There will be four activities within the Academy: a basic tutorial, Weapon Drills, Bot-based Custom Games with Bots on the player's team and the enemy team, and 4v4 Bot Arena playlists.
The Plasma Pistol, as would be expected, deals Plasma damage.
The Heatwave, being a Forerunner weapon, deals Hardlight damage.
Surprisingly, the Needler deals Kinetic damage.
The S7 Sniper, Skewer, and M41 SPNKR all deal a new damage type, which I am currently calling "Power".
The Ravager deals Plasma damage.
There are three tiers of Weapon Drills. Tier 1 features stationary Bots, Tier 2 features moving Bots, and Tier 3 features Bots displaying combat evasion behaviors like strafing and ducking behind cover.
Landing hits, getting kills, and hitting Bots immediately after they spawn all accrue points in the Weapon Drills.
Reaching drill-specfic score thresholds will award up to three stars for your performance.
The Heatwave has two firing modes: the default is a wide horizontal firing pattern, shooting six hardlight grenades in a row. The second firing pattern stacks the grenades vertically in two triangular groups of three. The second mode fires more slowly than the first mode.
The Heatwave's rounds overpenetrate targets and ricochet several times.
The Heatwave has an eight-round magazine and reloads shots one at a time.
General Discussion
Each day, the player who kills the most Bots, the player who wins the most games, and the team who wins their game the fastest will all receive the Fire Unicorn nameplate in Halo Infinite when it launches this Holiday.
The Fire Unicorn items have historically been given to fans who have their Halo creations featured in the monthly Community Spotlight posts, so this will likely be another way to earn the nameplate in the future.
PvP Arena Slayer may be enabled on Sunday, August 1, 2021, if 343i meets their engagement goals for the Tech Preview.
The Tech Preview will start with Live Fire, add in Recharge, and then add in Bazaar.
Splitscreen will not be supported in the Tech Preview but will still be present at launch.
Assassinations will not be featured in Halo Infinite at launch.
When assassinations return, they will be revamped to fit more fluidly with the rest of the sandbox and combat loops already in the game.
Xbox Series X Gameplay
The Skewer is a one-shot magazine projectile-based weapon that can kill with a hit anywhere on the body.
The Skewer can have at least three spikes in its reserves.
The Needler has a 26-round magazine and starts with 52 rounds in reserves. The reticle is similar to its Halo 4 appearance.
Tips will sometimes appear on the respawn screen and can be disabled if the player wishes.
Some Weapon Racks will glow red after their weapons have been taken. If this is the case, a new weapon will not respawn at that rack until the existing weapon has either despawned or had all its ammo used. This is the same behavior as seen with Tier 2 weapons in Halo 5: Guardians.


Ever see those cool, dynamic timestamps in Discord messages that show the time in everyone's local timezone and wonder how they're made? You need to use Discord's specific markdown for it, but a Discord Timestamp Generator makes it incredibly easy! You just input the date and time, choose the format you want (like short date, long time, or relative time), and it gives you the exact code to copy and paste into your message. It's perfect for coordinating events or deadlines with people in different parts of ،the world.